|
|
PMAV: Personal Micro Air Vehicle.
Build it from scratch in less than an hour.
Fly it in your backyard. No prior experience required.
Takeoff Vertically.
Yann LeCun
 October 2003
Jump Menu: [ INTRODUCTION | BUILDING IT | FLYING IT | PICTURES/VIDEOS ]
- The PMAV is very easy to build. It can be built from scratch
by anyone in less than an hour (see plan and building
instructions below).
- It is very easy to fly, even for total beginners.
- It is very sturdy, and practically unbreakable.
- It is highly maneuverable and can even take off vertically.
See pictures and videos below.
Specifications
- wingspan: 320mm, length: 360mm
- mass: less than 100 grams, including battery (2 cell Kokam LiPo, 340mAh)
- motor: GWS "Light Power System" LPS CN12-RLC 7.2V B (5:1 gear ratio)
- prop: GWS orange props: 6050 (beginners), 8043 (experienced
pilots), or 9047 (experts, allows vertical takeoff).
- radio: GWS receiver with 2 GWS Pico servos.
- battery: 2 cell Kokam Lithium-Polymer, 340mAh
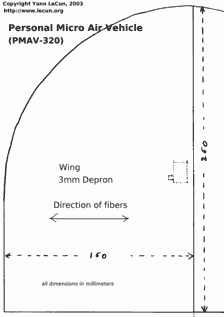
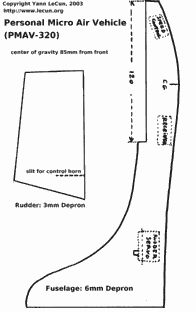
- materials: wing: 3mm Depron; fuselage: 6mm Depron; motor
mount: 6mm diameter carbon tube
- design: Yann LeCun, October 2003
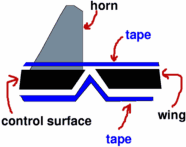
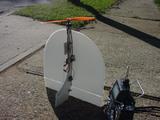
What makes the PMAV so special
- The PMAV control surfaces consist of an elevator and a rudder
which is mounted on a downward-pointing tail fin (placed below the wing).
This configuration allows the PMAV to bank automatically while
turning, without requiring ailerons.
- Unlike with traditional aileron-controlled airplanes, it is
practically impossible to flip the PMAV upside down. This makes the
PMAV very easy to fly by children and beginner pilots.
- Its larger-than-one thrust to weight ratio and high
maneuverability make it fun for expert pilots.
- The low aspect ratio wing is compact and sturdy. It also allows
ultra-low-speed flight at very high angles of attack.
- The larger-than-one thrust to weight ratio allows vertical
takeoffs and high-speed horizontal flights.
- The construction is fast, simple, and requires no glue
(everything is held together with tape!).
- You can take the PMAV anywhere with you (on plane trips...). The
wing and fuselage are held together with double-sided mounting tape
and can easily be disassembled and reassembled.
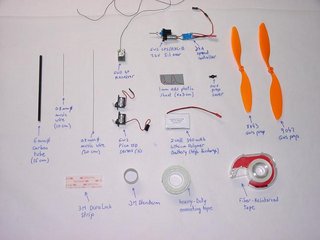
List of Material
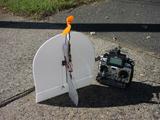
Here is a list of what you need to build the PMAV-320. A picture
of all the items is shown here. Click on the links for high resolution
versions of the picture in DjVu or JPEG.
building material
- 3mm Depron sheet: 320x320mm
- 6mm Depron sheet: 300x200mm
- Carbon tube, diameter: 6mm, length: 150mm.
- music wire: diameter 0.8mm (or similar), length: 300mm
- small sheet of ABS or Styrene: thickness: 1mm (or similar),
dimensions: 60x30mm
The Depron can be obtained from hardware stores in many European
countries, and from Depron USA
in the US. The PMAV can also be built with Zepron, a Depron substitute
sold by Air Dynamics in the US.
Tape and Supplies
- to hold the battery: a strip of 3M DuraLock (a Velcro-like thingy made of hard
plastic). This can be found at any hardware store. If you can't
find DuraLock, use sticky Velcro pads.
- to make the hinges: a roll of 3M Blenderm, or any other
surgical-type extensible tape that sticks well on Depron. Blenderm can be obtained from Air Dynamics.
- to hold the motor mount to the fuselage: a roll of
fiber-reinforced tape (available from any hardware store).
- to hold the wing to the fuselage: a roll of double-sided mounting
tape (available from any hardware store).
- to hold the horns to the control surfaces: a roll of thin
double-sided tape, or some foam-friendly (odorless) CA glue, or some 5-minute epoxy.
- to hold the prop to the motor: a few small rubber bands
Radio/Motor. All of this can be obtained from Balsa Products.
- Receiver, e.g. GWS 4P 4-channel receiver.
- Two submicro servos, e.g. GWS Pico, Cirrus 4.9, Cirrus 4.4...
- Motor: GWS "Light Power System" 7.2V LPS-RXC B (5:1 gear ratio)
- 4 Amp motor speed controler, e.g. GWS controler, or a Castle Creation Pixie 7P.
- GWS prop saver
- GWS orange propellers: 6050 (beginner pilot), 8043 (intermediate
pilot), and 9047 (expert pilot). By a few, because you might break them.
- Lithium-Polymer Battery pack: 2 cells, 340mAh from Kokam. Other
brands of LiPo batteries may be used as long as they can put out 5
Amps (e.g. Taisun 750mAh, E-TEC, I-RATE....).
- Charger for Lithium-Polymer batteries.
- Transmitter.
Printing the Plan
|
The plan consist of two sheets that can be printed on regular-sized
paper (US-Letter size or A4). Each sheet is provided in two format:
PNG and DjVu. I very strongly recommend that you use the DjVu version,
because the DjVu viewer allows you to print the plan at real size.
Downloading and installing the DjVu viewer takes only a minute.
To print the DjVu plan, bring up the DjVu version of the plan, and
click on the printer icon in the DjVu window (do not select
your browser's "print" menu). In the DjVu printing options,
select "one-to-one" as the printing scale.
|
|
Detailed Building Instructions
|
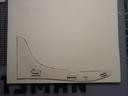
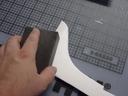
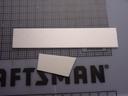
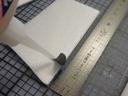
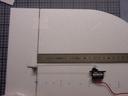
1: Cut the fuselage template from the plan and place it
on the 6mm Depron sheet.
| |
|
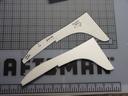
2: Cut the main fuselage part from the 6mm Depron sheet with a cutter.
| |
|
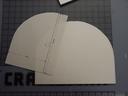
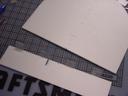
3: Cut the half-wing template from the plan, and use it to cut
the wing from the 3mm Depron sheet (cut the left half, then flip the
template to cut the right half). Make sure the fibers of the Depron are
aligned as indicated on the plan. on the 6mm Depron sheet.
| |
|
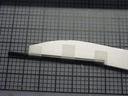
4: Sand the trailing edge of the tail fin.
| |
|
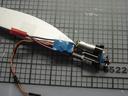
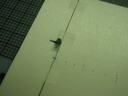
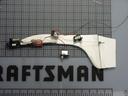
5: Get the 6mm carbon tube (150mm in length) and assemble
it with the fuselage using fiber-reinforced tape as shown on the picture.
| |
|
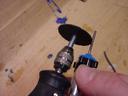
6-a: Step 6-a to 6-d are optional (though highly recommended).
They will allow us to mount the propeller to the motor with rubber bands.
This will avoid damaging the propeller in case of a high-speed crash.
Shorten the prop shaft of the propulsion system using a Dremel cutting disc,
or a metal saw, or a heavy-duty wire cutter.
| |
|
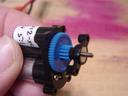
6-b: Put the GWS prop saver on the shaft and hold it with the
hex nut provided with the motor.
| |
|
6-c: Put the second nut on the shaft and tighten it against the
fist nut (hold the second nuts with pliers and rotate the prop saver).
| |
|
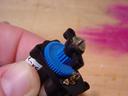
6-d: Sand the edges of the second nut so that the propeller
will easily lock on to the nut and easily pop out.
| |
|
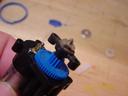
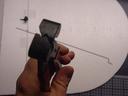
7: Stick a small piece of double-sided tape on the tip
pf the carbon tube. Then slide the motor onto the tube. The piece
of tape should create enough friction to hold the motor in place.
| |
|
8: Cut the rudder and the elevator from the 3mm depron sheet.
A template for the rudder is provided with the plan. The elevator
is a 320mm by 60mm rectangle.
| |
|
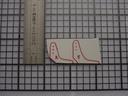
9: Cut the control horns from the 1mm plastic sheet (ABS or
styrene sheets can be found at any hobby store). The rudder horn
should be about 21mm high, and the elevator horn about 25mm.
| |
|
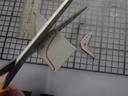
10: The plastic sheet can be cut with scissors. Drill holes in
the horns as indicated. I drilled with a 1mm drill bit so that the
0.8mm music wire can easily fit. Use whatever size is appropriate for
the diameter of the music wire you happen to have.
| |
|
11: Cut a slit for the control horn in the leading edge of the
elevator control surface, about 30mm from the center as shown. You can
either glue the horn with foam-friendly CA glue (also called "odorless
Cyanoacrylate glue". Regular CA glue melts Depron) as shown, or you
can stick a piece of double-sided tape on each side of the horn and
slide it in place.
| |
|
12: Cut a slit for the control horn in the leading edge of the
rudder as indicated on the plan. As with the elevator horn, you can
either glue it with foam-friendly CA glue, or stick it with a piece of
double-sided tape on each side.
| |
|
13-a: Assemble the elevator to the wing and the rudder to the
fuselage, using Blenderm tape for hinges. The edges of the wing and
the control surface should be cut at an angle. Each hinge consists of
two pieces of tape, as shown on the diagram.
|  186 186 |
|
13-b: Use 4 hinges for the elevator. Start with the tape
on the opposite side of the control horn.
| |
|
13-c: Assemble the to parts, and put the pieces of tape on the
opposite side.
| |
|
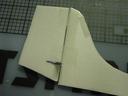
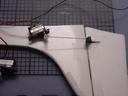
14: Repeat with the rudder (make two hinges). Reinforce the tip
of the tail fin with fiber-reinforced tape as shown.
| |
|
15: Connect the rudder servo to channel 1 of the receiver, the
elevator servo to channel 2, and the speed control to channel 3.
Turn on your transmitter, and connect the battery. Make sure the
rudder and elevator sticks and trims are in the neutral positions.
Now that the servos are in their central position, disconnect the
battery. Adjust the position of the control horns on the servos
so that they form a 90 degree angle with the body of the servo.
| |
|
16: Make the rudder control rod with the short piece of 0.8mm
music wire. Using Z-bend pliers (or with long-nose pliers if you don't
have Z-bend pliers), make two Z-shaped bends, approximately 70mm apart.
| |
|
17: Place the control rod on the outer-most hole on the rudder
control rod, and in the outer-most hole on the servo horn (expert
pilot) or the second outer-most hole (beginner or intermediate pilot).
| |
|
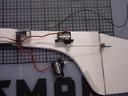
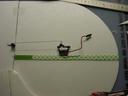
18: Place a piece of double-sided mounting tape on the servo.
Stick the servo in place, making sure that the rudder is aligned with
the fuselage.
| |
|
19: Repeat steps 16 to 18 for the elevator servo.
The distance between the two Z-bends for the elevator control
rod should be approximately 125mm.
| |
|
20: Stick a piece of double-sided mounting tape along the
centerline of the wing.
| |
|
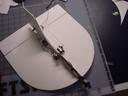
21: Stick the fuselage onto the tap, making sure the
camber of the wing is symmetric on the left and right sides.
| |
|
22: Stick the receiver to the side of the fuselage with
mounting tape. Place a piece of 3M DuraLock on the fuselage,
approximately 30mm from the front, and another piece on the battery
pack. If you can't get any DuraLock from your local hardware store,
use a piece of Velcro.
| |
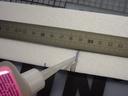
The center of gravity should be approximately 85mm from the front
of the wing. If necessary, the position of the CG can be adjusted by
modifying the position of the battery.
That's it. Your PMAV is ready to fly.
With the 6050 prop, the PMAV is very gentle and can be flown by just
about anyone. The plane is so light that even a full speed crash in a
hard surface will not cause any damage (assuming the "prop saver"
option was implemented).
With the 8043 prop, the flight is a lot snappier. It becomes possible
to fly around at very low speed with a "nose up" attitude (high angle of
attack).
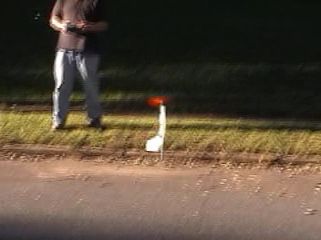
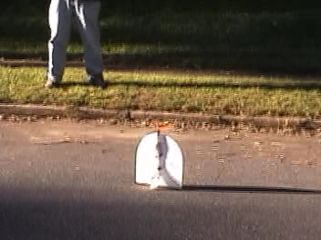
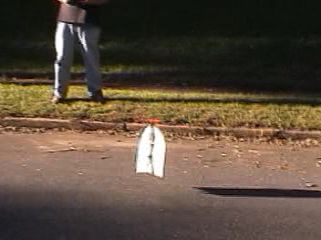
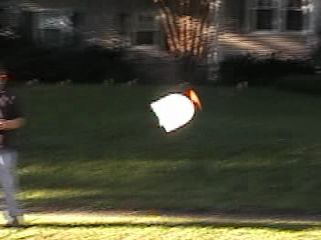
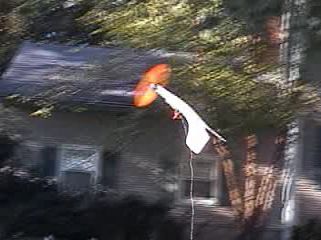
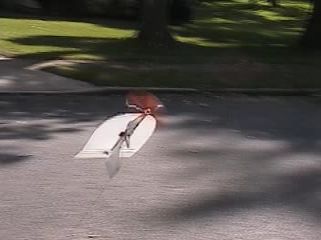
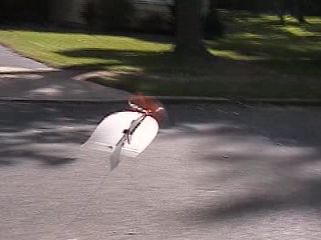
With the 9047 prop, it is possible to take off vertically. Just put
the PMAV on the ground, and apply full power. The PMAV will take off,
and rotate around a vertical axis (1/2 turn to a full turn). The nose
will then come down by itself.
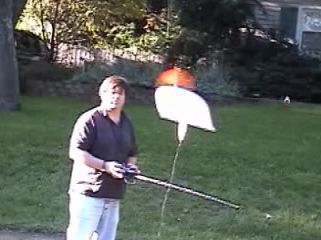
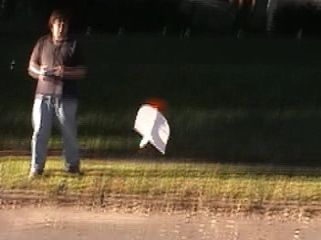
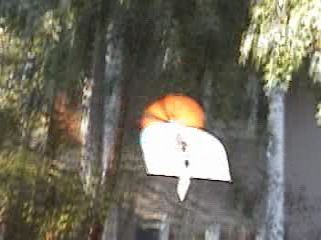
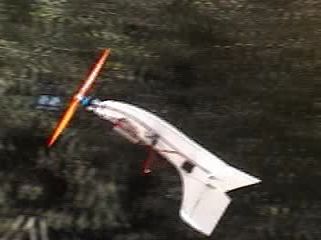
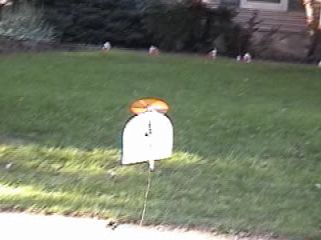
These videos demonstrate the extreme maneuverability, huge speed
range, and sturdiness of the PMAV. Most videos were shot in the street
and front yard of a typical suburban home with lots of obstacles
around (trees, cars, telephone poles, cables, intrigued neighbors,...).
Copyright Yann LeCun, 2003
|

